Ccleaner update not working in windows 10. I am facing some issues in this while updating it. If you have any idea to solve it. Then give us.
Are you troubled with the CCleaner update not working? If yes, then don't worry as here you will see multiple solutions to fix that problem. So, let us discuss them one by one.
Below are the steps that you need to carry out in order to fix the CCleaner update not working problem.
Step 1: If the CCleaner does not update to the latest version on your system, then reboot your system and run the cleaner app again.
Step 2: One major reason for the update to fail is that the name on the signing certificate does not match with the publisher name.
Step 3: The name on the signing certificate should be the same as the publisher's name to successfully update the CCleaner app.
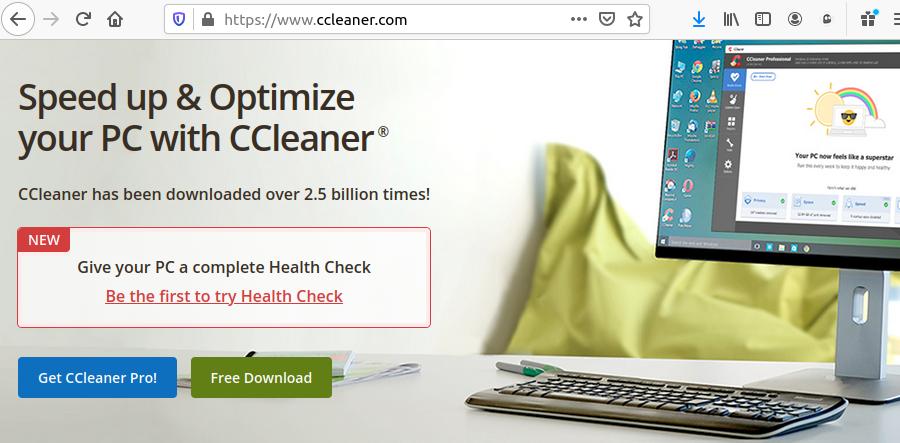
Step 4: The issue can easily be fixed by updating CCleaner by going to the main website.
Step 5: In case you have installed the security app of Malwarebytes premium on your, then the download of such a malware protection software can lead to the problem of CCleaner update not working. In order to fix this issue, then you will have to disable the ransomware protection for a little while.
Step 6: To do this, first, you need to go to the Settings, protection, real-time protection, and then Ransomware protection.
Step 7: Disable the module by moving the toggle button to the left.
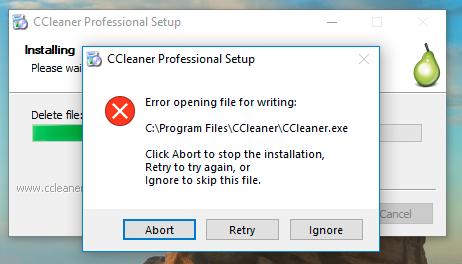
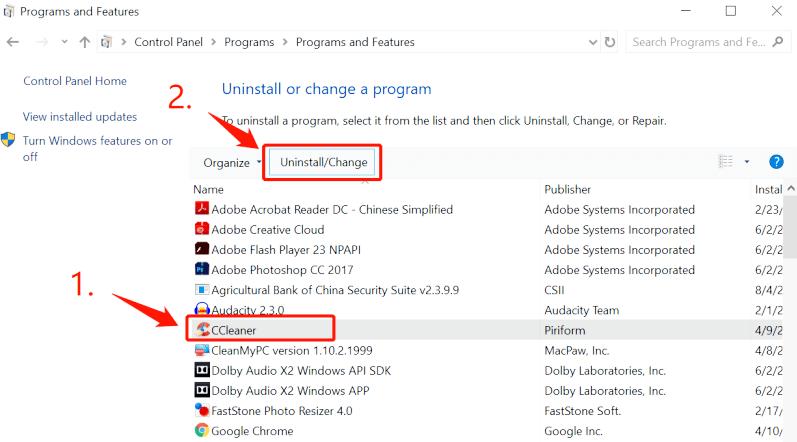
Step 8: In case the issue still remains, then uninstall and then delete all the files related to CCleaner on your system.
Here are all the steps that you need to perform in order to fix the problem of the CCleaner not working after the Windows 10 update.
Step 1: In case your CCleaner application stops working after a Windows 10 update, then that must be happening because of the Windows 10 compatibility issues.
Step 2: This issue can easily be resolved by reinstalling the CCleaner app from the main website. CCleaner version 5.0 and then it becomes compatible with Windows 10 OS.
Step 3: Please ensure that you delete the CCleaner app that you installed earlier and other related files before installing the latest version.
When the folders that you wish to scan have duplicate files, which you are not able to find, then that means the folder is not in the list of "Include" or there is a good chance that your folder is hidden.
Step 1: In case the CCleaner update is not working properly on your system, then you need to see if the automatic update feature is enabled on CCleaner.
Step 2: In case it is disabled, then go to the main page of the CCleaner and then click on the icon of Settings by going to the panel given on the left side.
Step 3: Check the checkbox of "Automatically check for updates to CCleaner" and then restart the app.
Step 4: The next thing that you need to do is to ensure that the feature of Important updates or emergency updater is enabled or not.
Step 5: In case you find it turned off, then the auto-update won't happen.
Step 6: Go to the option of Updates under CCleaner and then select the checkbox of "Apply these updates automatically" below the section of Important Updates.
Windows 11 Controller not Working - How to Quickly Fix It?
How to Adjust Brightness, Screen Color, Contrast and Gamma on PC?
How to Clear Cache in Windows 11?
How to Format an NVME SSD on Windows 11?
How to Run Android Apps on Windows 10?
How to Change Monitor Number in Windows Display Settings?
How to Fix Game Opening on the Wrong Monitor?
How to Change the Keyboard Settings to Default on Windows 11?

How to Get Purble Place on Windows 11/10?
~ May 23, 2026
How to Check CPU Temperature Windows 11?
~ May 23, 2026
How to Record Your Screen on Windows 11
~ May 23, 2026How to Fix Icons in Windows 11
~ May 23, 2026
How do I Fix Error Code 0x80070570 on Windows 10
~ May 23, 2026
Fix Touchpad Gestures Are Not Working on Windows 11
~ May 23, 2026
How to Fix the WHEA Uncorrectable Error on Windows 10
~ May 23, 2026
Top Searches in Windows 10
How to Find Windows 10 Product Key 2026?
Dec 8, 2025How to Convert FireWire Connections to USB?
Dec 8, 2025How do I Unlock my Keyboard on Windows 10?
Dec 8, 2025How do I Fix the Unresponsive Taskbar in Windows 10?
Feb 23, 2024How to Install the Amazon Prime Video App on Windows 10?
Dec 8, 2025How to Recover Uninstalled Programs on Windows 10?
Dec 8, 2025Do I Really Need Realtek High Definition Audio in Windows 10?
Dec 8, 2025How to Enable Bitlocker on Windows 10 Home?
Dec 8, 2025How to Change Network Binding Order in Windows 10?
Dec 8, 2025How do I Turn Off Windows Volume Overlay?
Dec 8, 2025