How to Install ADB on Windows, macOS
Here is a very peculiar feature in the form of Android Debug Bridge (ADB) that can enable accessing the hidden features of your Smartphone. But this can be given effect only when you have installed the ADB on your computer. This unique guide truly showcases the ways how you can install ADB on Windows, MacOS going forward.
Here is the Phone-based Set Up
When you go on to install ADB on Windows, MacOS it will be partially done if you haven’t accomplished configuration on your Android Phone primarily. So, here is the first portion of this entire set up which has more to do with setting up ADB on your Smartphone.
Step 1 - Just begin by launching the “Settings” application on your phone.
Step 2 - Now at the bottom of the list that gets opened you have to tap the “About Phone” option on your Smartphone.
Step 3 - Here you have to enable the “Developer Mode” by tapping the “Build Number” option 7 times which will eventually get confirmed when you see a “Toast Message”.
Step 4 - Again you must get back to “Settings” to witness the newly evolved “Developer Options” menu for access.
Step 5 - Just get inside the menu and cause to enable the “USB Debugging Option”.
Setting Up Android Debug Bridge (ADB) on your Windows
Step 1 - Primarily you need to download the ZIP folder of Android SDK Platform Tools for Windows.
Step 2 - Cause the extraction of this ZIP file into a folder.
Step 3 - Now you must open Windows Explorer and should browse down to the folder where you extracted the contents of Android SDK Platform Tools.
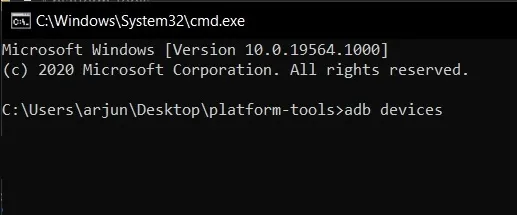
Step 4 - Here you have to facilitate the opening of the Command Prompt through the same folder. You can get this done simply by holding the Shift key along with giving a right-click within the folder and further clicking on the “Open Command window here”.
If you are on Windows as a Windows 11 user you should find the “Open in Terminal” once you right-click in the context menu without having any need to press the shift button.
Step 5 - The next thing that ought to be done is to connect your computer to the Android Device followed by changing the USB mode to “File Transfer” mode.
Step 6 - The next task is to enter the “adb services” command in the Command Prompt window.
Step 7 - At this point in time you have to grant access to the USB Debugging when you see a Prompt on your Android Device’s screen.
Step 8 - Here again you have to re-punch the command that you witnessed in step 6 which should enable you to see the device’s serial number.
Here is How to Set-Up ADB on Your MacOS
When you wish to install ADB on Windows, or MacOS, you should not forget to check the process by implementing which you will successfully be able to install the ADB on MacOS.
Step 1 - For MacOS as well you have to download the SDK Platform Tools ZIP file.
Step 2 - Now facilitate the extraction of the ZIP folder to an easily accessible location on your computer.
Step 3 - Here, you must open the Terminal.
Step 4 - Resort to entering the following path wherein you extracted your ZIP folder into.
The path is - cd /path/to/extracted/folder/
Step 5 - Now prefer linking your Android Device with your Mac using the USB cable. Here also, you have to modify the USB connection to the MTP-based file transfer protocol.
Step 6 - Go on to execute the following command as soon as the Terminal is in the same folder your ADB Tools are in.
The command happens to be - daemon: ./adb devices
Step 7 - As and when you see the Prompt in the nature of “Allow USB Debugging” just allow the connection.
Step 8 - Repeat the process of punching in the command that you witnessed in step 6 above which will give you a kind of information by reflecting the device’s serial number in MacOS’s Terminal Window.
- Published by: Mick
- Category: Windows
- Last Update: 6 days ago
Related Blog
How to Get Purble Place on Windows 11/10?
~ Dec 8, 2025How to Check CPU Temperature Windows 11?
~ Dec 8, 2025How to Record Your Screen on Windows 11
~ Dec 8, 2025How to Fix Icons in Windows 11
~ Dec 8, 2025How do I Fix Error Code 0x80070570 on Windows 10
~ Dec 8, 2025Fix Touchpad Gestures Are Not Working on Windows 11
~ Dec 8, 2025How to Fix the WHEA Uncorrectable Error on Windows 10
~ Dec 8, 2025Featured Blog
How to Fix Error Code csc_7200026 on AliExpress
Dec 8, 2025How to Cancel Your Club Pogo Account
Dec 8, 2025DuckDuckGo Not Working? Why & How to Fix it
Dec 8, 2025How to Register a Supercell ID Account?
Dec 8, 2025Spot Geek Squad Scams: Safety Tips 2025
Dec 8, 2025Top Questions
How to Find Windows 10 Product Key 2025?
Dec 8, 2025How to Increase Wifi Speed in laptop Windows 10?
Dec 8, 2025How to Convert FireWire Connections to USB?
Dec 8, 2025How do I Unlock my Keyboard on Windows 10?
Dec 8, 2025How to Create a Roku Channel in 3 Steps?
Dec 8, 2025How to Fix Gmail App Keeps Crashing Problem?
Dec 8, 2025Categories
- OTT
- 616 ~ Articles
- Windows
- 491 ~ Articles
- 164 ~ Articles
- Browser
- 145 ~ Articles
- Laptop
- 72 ~ Articles
- Antivirus
- 40 ~ Articles
Top Searches in Windows
How to Check CPU Temperature Windows 11?
Dec 8, 2025How to Install ADB on Windows, macOS
Dec 8, 2025Password Protect a Folder in Windows 10 Fix It
Dec 8, 2025How to Fix the WHEA Uncorrectable Error on Windows 10
Dec 8, 2025How do I Fix Error Code 0x80070570 on Windows 10
Dec 8, 2025How to Fix Windows 11 Settings App Crashing Issue
Dec 8, 2025How to Enable Secure Boot to Install Windows 11
Dec 8, 2025How to Use Excel to Find the Mean, Median & Mode Ranges
Dec 8, 2025How to Get Microsoft Word to Stop Deleting as You Type
Dec 8, 2025Fix Touchpad Gestures Are Not Working on Windows 11
Dec 8, 2025