Hello Guys, Actually I want to connect my windows to network but Can't connect to network after Windows Update? So anyone have any idea?
Can’t connect to the network after a Windows update, it is the common error that commonly comes in windows 10. Here you can find many ways through which you can solve your problem by yourself in order to make the error of can’t connect to this network disappear. Just follow the instructions below to get the complete solutions for the respective error.
Find below the mentioned solutions for the specific problem of can’t connect to the network after the Windows Update.
An error stating unable to connect to the network on Windows 10, is caused due to your network adaptor. It is the reason in many cases that are unable to connect to the network and get the error. So, you can easily make your error removed by uninstalling the network adapter and reinstalling it.
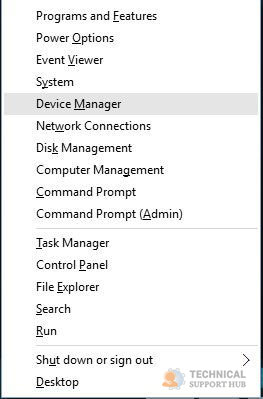
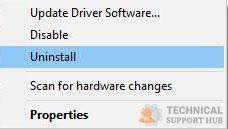
You Can Simply Uninstall and then Reinstall the Windows Wireless Network Adaptor by Following Steps:
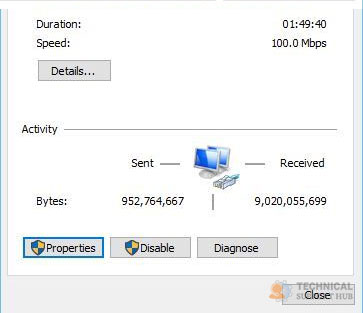
The error can't connect to the network after Windows Update, many times appears just due to a misconfiguration in your IP network protocol list settings. You may deactivate your network Protocols and after that, you can solve the error just by following the below-listed steps:

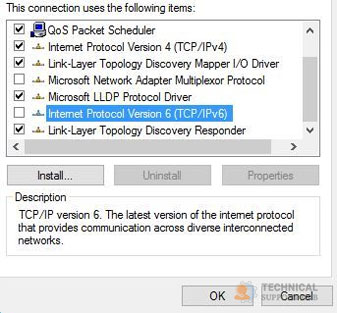
Now, your problems will be fixed and there will be no additional windows 10 that won’t connect to wifi error that will come through. You also have to deactivate IPv6 on your router as well which can eliminate the Windows error. One or more network protocols are missing windows 10.
Often the network issues are simply caused by the drivers when they get outdated. This causes the windows unable to connect to a network issue that leads to the error message. You can update your drivers with the latest one. All you need is a device that is connected to the internet connection.
Now, you just have to go to the website of your network adapter manufacturer and download the latest drivers for your network adapter. After you get the latest drivers, just go and install the latest drives on the PC that is showing you with error.
You can update any driver manually by just visiting the driver file that is needed to be updated. All you have to do is look out for the model number of your driver that you can find in the settings zone of your computer. There can be also the risk concerned that takes you to the installation of the wrong driver.
You get fed up when again and again you get windows 10 unable to connect to the network after the Windows Update error. Probably, this is also a simple and very easy solution that can make your error go easily.
For this, network when the protocol error appears, then surely you can improve it by forgetting your wireless network and then reconnecting it as a new network registry. You can fix the problem by following the steps below:

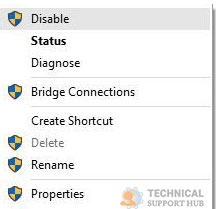
You can also rectify that Windows 10 can’t connect to this network error you can do by making the disable on your network adapter and then enabling it again.
These are all possible ways to fix the error. I hope the following information will help you to fix can't to connect to the network after Windows Update.
Windows 11 Controller not Working - How to Quickly Fix It?
How to Adjust Brightness, Screen Color, Contrast and Gamma on PC?
How to Clear Cache in Windows 11?
How to Format an NVME SSD on Windows 11?
How to Run Android Apps on Windows 10?
How to Change Monitor Number in Windows Display Settings?
How to Fix Game Opening on the Wrong Monitor?
How to Change the Keyboard Settings to Default on Windows 11?

How to Get Purble Place on Windows 11/10?
~ May 23, 2026
How to Check CPU Temperature Windows 11?
~ May 23, 2026
How to Record Your Screen on Windows 11
~ May 23, 2026How to Fix Icons in Windows 11
~ May 23, 2026
How do I Fix Error Code 0x80070570 on Windows 10
~ May 23, 2026
Fix Touchpad Gestures Are Not Working on Windows 11
~ May 23, 2026
How to Fix the WHEA Uncorrectable Error on Windows 10
~ May 23, 2026
Top Searches in Windows 10
How to Find Windows 10 Product Key 2026?
Dec 8, 2025How to Convert FireWire Connections to USB?
Dec 8, 2025How do I Unlock my Keyboard on Windows 10?
Dec 8, 2025How do I Fix the Unresponsive Taskbar in Windows 10?
Feb 23, 2024How to Install the Amazon Prime Video App on Windows 10?
Dec 8, 2025How to Recover Uninstalled Programs on Windows 10?
Dec 8, 2025Do I Really Need Realtek High Definition Audio in Windows 10?
Dec 8, 2025How to Enable Bitlocker on Windows 10 Home?
Dec 8, 2025How to Change Network Binding Order in Windows 10?
Dec 8, 2025How do I Turn Off Windows Volume Overlay?
Dec 8, 2025