Hello Guys, Please let me know that how do I fix the wifi adapter on Windows 10? I don't know how to fix it. I tried many times but unable to fix it. Help me.
Several software and hardware related problems occur after the Windows 10 upgrade. One among these problems is with the WiFi adapter that’s not working in Windows 10 for some users. As a consequence, some users reported that the computer is unable to detect and recognize the WiFi adapter, which worked fine in Windows 8 or Windows 7. So, how to fix the WiFi adapter on Windows 10 system? Not to worry, as we have a solution for you. But before you are set to fix the WiFi adapter on Windows 10, check out some similar issues that can be resolved with the solutions given below.
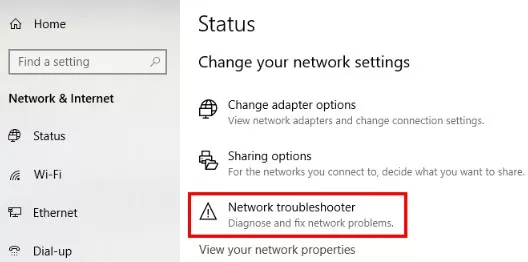
One of the best and easiest ways to fix the WiFi adapter on Windows 10 is to run the network troubleshooter. All you need to do is run and it will do the required work for you. Here's the steps to run the network troubleshooter in Windows 10:
1. Firstly, navigate to Settings.
2. Now, go to Updates & Security and then Troubleshoot option.
3. Choose Internet Connections, and then Run the Troubleshooter.
4. Keep following the on-screen instructions and let the process finish.
5. Lastly, restart your computer.
In case the network troubleshooter fails to resolve the problem, then jump to the next solution.
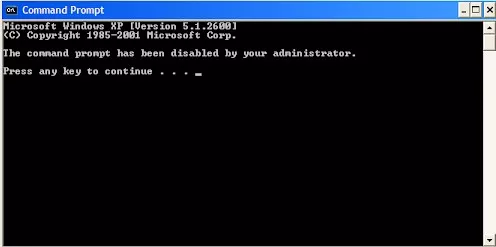
1. Firstly, right click on the Start Menu button and select Command Prompt (as admin)
2. Now, enter the given command and press Enter:
netcfg –s n
The command displays a list of network protocols, drivers and services. Therefore, check if DNI_DNE is in the list or not. If it is present, then it's a problem.
3. In case DNI_DNE is listed, then using the command prompt window, enter the following command and press Enter: reg delete HKCRCLSID\{988248f3-a1ad-49bf-9170-676cbbc36ba3} /fnetcfg -v -u dni_dne
This command should resolve the issue. However, if you get an error 0x80004002 after entering the command than this value is either not in the registry, or need to be deleted permanently. So here’s what you need to perform if you receive this error code:
1. Navigate to Search, type regedit and launch Registry Editor.
2. Now, go to the following path:
HKEY_CLASSES_ROOT\CLSID\{988248f3-a1ad-49bf-9170-676cbbc36ba3}
3. Lastly, delete DNI_DNE if it still exists in the registry.
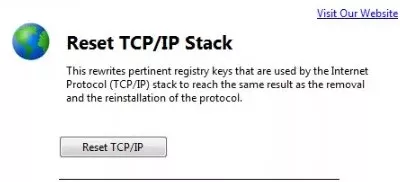
If the above two solutions didn’t work to fix the WiFi adapter on Windows 10, then simply try resetting the TCP/IP stack. For doing that, enter a few command lines into the command prompt. This is how you need to do:
1. Initially, right-click on the Start Menu button and select Command Prompt (as Admin)
2. Now, enter the following lines into Command Prompt, and then press Enter after each one:
netsh int ip reset
netsh int tcp set heuristics disabled
netsh int tcp set global autotuninglevel=disabled
netsh int tcp set global rss=enabled
3. Finally, restart your computer and check if you’re able to connect to WiFi now.

Since you cannot download anything with your current internet connection, so download the necessary drivers via another computer or through another network.
In order to get the most suitable drivers for your system, go to your network adapter manufacturer’s website. On the website, search for the drivers for your network adapter. Hopefully, a fresh set of network drivers will surely fix the WiFi adapter on Windows 10 system.
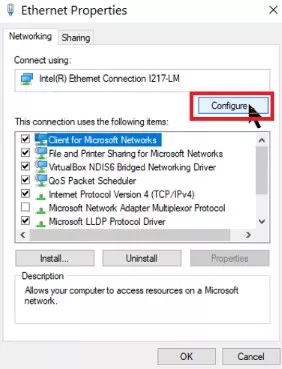
Another method, you can apply is to change the adapter settings (read: disable the TCP/IPv6 protocol). Follow the steps to do that:
1. Launch Properties of the Network Adapter and check for a wireless adapter that is currently running.
2. Now, search for the Internet Protocol Version 6 (TCP/IPv6) under the options that show up and uncheck IPv6 in order to
disable it.
3. Lastly, click on OK and restart the computer to apply or save the changes.
You can also try uninstalling the network adapter first. Below given are the steps to uninstall the network adapter in Windows 10:
1. Enter devm into Search and launch the Device Manager.
2. Search for your network adapter.
3. Now, right-click your network adapter, and go to Uninstall.
4. Following on-screen instructions, restart computer.
5. Lastly, install the network adapter driver once again.
Windows 11 Controller not Working - How to Quickly Fix It?
How to Adjust Brightness, Screen Color, Contrast and Gamma on PC?
How to Clear Cache in Windows 11?
How to Format an NVME SSD on Windows 11?
How to Run Android Apps on Windows 10?
How to Change Monitor Number in Windows Display Settings?
How to Fix Game Opening on the Wrong Monitor?
How to Change the Keyboard Settings to Default on Windows 11?

How to Get Purble Place on Windows 11/10?
~ May 23, 2026
How to Check CPU Temperature Windows 11?
~ May 23, 2026
How to Record Your Screen on Windows 11
~ May 23, 2026How to Fix Icons in Windows 11
~ May 23, 2026
How do I Fix Error Code 0x80070570 on Windows 10
~ May 23, 2026
Fix Touchpad Gestures Are Not Working on Windows 11
~ May 23, 2026
How to Fix the WHEA Uncorrectable Error on Windows 10
~ May 23, 2026
Top Searches in Windows 10
How to Find Windows 10 Product Key 2026?
Dec 8, 2025How to Convert FireWire Connections to USB?
Dec 8, 2025How do I Unlock my Keyboard on Windows 10?
Dec 8, 2025How do I Fix the Unresponsive Taskbar in Windows 10?
Feb 23, 2024How to Install the Amazon Prime Video App on Windows 10?
Dec 8, 2025How to Recover Uninstalled Programs on Windows 10?
Dec 8, 2025Do I Really Need Realtek High Definition Audio in Windows 10?
Dec 8, 2025How to Enable Bitlocker on Windows 10 Home?
Dec 8, 2025How to Change Network Binding Order in Windows 10?
Dec 8, 2025How do I Turn Off Windows Volume Overlay?
Dec 8, 2025