Please let me know that how to fix for 100% disk usage on Windows 10. I am facing some issues while using windows 10. Help me.
If the Task Manager of Windows 10 is displaying 100% disk usage or there is something that is overloading your hard drive with work, then your system will become very slow and you will not be able to carry out any job using it. This issue can appear on its own. However, this issue can easily by resolved by following the simple solutions given below.
.webp)
SuperFetch will allow you to reduce boot time for the efficient loading of some programs. Enabled SuperFetch causes disk performance issues in Windows 8 and Windows 10. Worry not, as you can fix this problem by following the steps given below.
Step 1: Press the Windows key on your laptop and then enter the "command prompt". After that, choose the option of Run as administrator.
Step 2: Now, go to the prompt of the User Control Panel and select Yes.
Step 3: After that, the command prompt will open up one more time. After that, you need to enter the command "net.exe stop SuperFetch"
Step 4: Press Enter.
Step 5: In case it shows that the command given above is invalid, then try the command "net.exe stop sysmain".
Step 6: Wait for a while and check if your computer is performing well or not. You can also check the disk usage on the Task Manager given in the Windows search bar. Now, go to the Processes tab and check the Disk column. If the disk usage is less than 100%, then that means the issue is resolved.
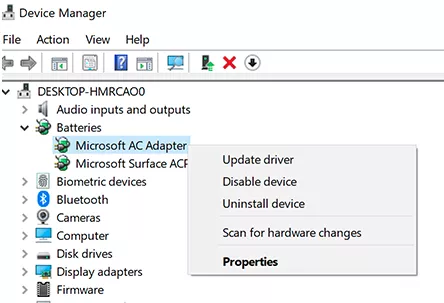
If the above solution doesn't fix your problem, then that may be happening because your device drivers are not updated. There are two ways of updating the device drivers. One is the manual update and the other is by using third-party software. If you don't have any technical knowledge, then you must update the drivers automatically.

Below are the simple steps that you need to follow for performing a disk check.
Step 1: Press the Windows key and X key simultaneously on your keyboard and then select the option of command prompt.
Step 2: Go to the User Account Control and select Yes.
Step 3: The command prompt will open up one more time. Now, enter the command given below. Enter chkdsk.exe /f /r.
Step 4: Press the Enter key on your keyboard and then select Y to confirm that you want to perform a disk check when you will reboot your computer the next time. Before you do so, you must make sure that all the applications are closed.
Step 5: Once you are done performing a disk check, then you need to take a look at the disk of your computer one more time by going to the Task Manager. If you find that your disk column is not 100%, then that means the issue is resolved.
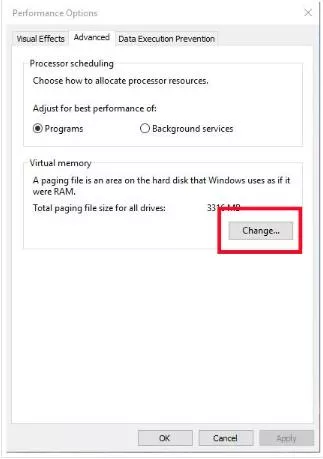
Virtual memory is an extension given to the physical memory of your computer system. It is made by combining a part of your hard drive and RAM. When sufficient RAM isn't there to carry out the work, then files are stored in the virtual memory. When required, they are switched back to RAM. Below are the steps that you need to perform for resetting virtual memory.
Step 1: Press the Windows key and Pause key simultaneously on your keyboard. After that, select Advanced System Settings given in the panel.
Step 2: Navigate to the Advanced tab and then go to Settings.
Step 3: After that, go to the Advanced tab one more time and select "Change" given under the Virtual Memory section.
Step 4: Please make sure that the box "Automatically manage paging file size for all drivers" is not checked.
Step 5: Now, choose your Windows drive and enter the maximum and initial size of your virtual memory. When you are done entering the values, select Set and then select Ok.
Step 6: Remove all the "Temp" files from your computer. Press the Windows key and R key at the same time. After that, type Temp in Run and then press Enter. This will launch the Temp folder of Windows Explorer. Moreover, it will display all the temp files on your system.
Step 7: Select all the files and remove them.
Step 8: Now, check Disk usage. If it is not 100% anymore, then that means the issue is resolved.
Windows 11 Controller not Working - How to Quickly Fix It?
How to Adjust Brightness, Screen Color, Contrast and Gamma on PC?
How to Clear Cache in Windows 11?
How to Format an NVME SSD on Windows 11?
How to Run Android Apps on Windows 10?
How to Change Monitor Number in Windows Display Settings?
How to Fix Game Opening on the Wrong Monitor?
How to Change the Keyboard Settings to Default on Windows 11?

How to Get Purble Place on Windows 11/10?
~ May 23, 2026
How to Check CPU Temperature Windows 11?
~ May 23, 2026
How to Record Your Screen on Windows 11
~ May 23, 2026How to Fix Icons in Windows 11
~ May 23, 2026
How do I Fix Error Code 0x80070570 on Windows 10
~ May 23, 2026
Fix Touchpad Gestures Are Not Working on Windows 11
~ May 23, 2026
How to Fix the WHEA Uncorrectable Error on Windows 10
~ May 23, 2026
Top Searches in Windows 10
How to Find Windows 10 Product Key 2026?
Dec 8, 2025How to Convert FireWire Connections to USB?
Dec 8, 2025How do I Unlock my Keyboard on Windows 10?
Dec 8, 2025How do I Fix the Unresponsive Taskbar in Windows 10?
Feb 23, 2024How to Install the Amazon Prime Video App on Windows 10?
Dec 8, 2025How to Recover Uninstalled Programs on Windows 10?
Dec 8, 2025Do I Really Need Realtek High Definition Audio in Windows 10?
Dec 8, 2025How to Enable Bitlocker on Windows 10 Home?
Dec 8, 2025How to Change Network Binding Order in Windows 10?
Dec 8, 2025How do I Turn Off Windows Volume Overlay?
Dec 8, 2025