Hello Guys, Please let me know how to fix Windows 10 Won’t Connect to WiFi? I don't know how to fix it. I tried many times but unable to fix it. So can anyone have any idea?Help me

Not being able to connect to the internet can really get into your nerves and at times even the Windows Network Troubleshooter doesn’t help with this issue. It is a common issue with Windows 10 computers, especially after an update is released, but we’ve found that usually you can resolve the problem and get back online with one of the following steps outlined below to fix Windows 10 Won’t Connect to WiFi.
Things you need to fix Windows 10 Won’t Connect to WiFi

On the bottom right of your computer screen, hit the wifi icon to make sure it is turned on. In case you see an airplane icon, you will be required to set your settings to “Airplane Mode” and you will either need to turn that off, or turn WiFi back on.
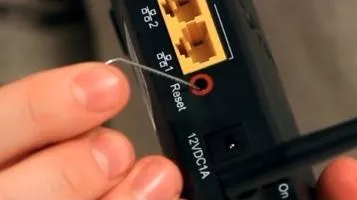
Use a pen/pencil to reset your Router at the back side of the router.
If you have got other wifi networks available, then try and connect to that one. If that works and you are able to connect to other networks, you will have to try to restart your router or forget and reconnect to your WiFi network.
1. On the left corner of your computer screen, click on the start icon in order to forget and reconnect to your network and then click on “change Wi-Fi settings”.
2. Following that, click on “Manage Known Networks”.
3. Under “Manage Known Networks”, click on the WiFi network you are trying to connect to and choose the option “Forget”.
4. Lastly, You can now try to connect to the network again. If that does not resolve your issue, have a look at the other
options below.

Restarting your device is the most simple solution to resolve any issue. A simple restart after spending hours trying to figure out what’s wrong with your device is the step you wanna perform.
If you are able to connect to the internet with a cable, you might have an issue with your drivers or your WiFi card.
Procedures to fix Windows 10 Won’t Connect to WiFi
1.Reset TCP/IP stack
2. Primarily, go to the Command Prompt (Click your start button, type in “cmd” and open the application).
3. Next, enter the following commands into the first line and then tap on entering after you have typed each line.
netsh winsock reset (press Enter)
netsh int ip reset (press Enter)
ipconfig /release (press Enter)
ipconfig /renew (press Enter)
ipconfig /flushdns (press Enter)
4. Again, try and connect to the wifi and then restart your computer system.
5.Make sure to update the network adapter driver
6. Click on the start button and type and search for the “Device manager”.
7. Go to the “Device manager” and from the list click on the “Network adapters” and click the arrow to expand that section.
8. Next, Right click on the adapter and select “Update driver.” When the prompt appears, click “Search automatically for updated driver software”. Now you will have to restart your computer once you have installed the new driver.
Note: In case your computer cannot locate the driver to update at this point you will need to download it from the manufacturer. If you are not able to connect to the internet with an ethernet cable, you will need to download the driver onto a usb flash drive so that you can select it and manually update it.
1. Make sure to identify the driver that will be required for your computer. However, You can search for the driver on the Window’s official website or search the internet. Ensure that you only download the driver from the Window’s official site or a site you trust.
2. From the list in the dropdown, you will see the name of the driver.
3. Once you identify the name of your driver in the list on the Window’s official site, remember to ensure that it matches the driver you are missing trying to update.
4. Now, Download the file to the computer you need to update or save it to a USB flash drive.
5. Next, return to the device manager after you have downloaded the file, and click on “Update Driver” again. This time, click on the “Browse my computer for driver software” and then choose the folder the driver is located in (usually your downloads or the folder where your USB drive is located).
6. It will be listed under compatible hardware, Once your computer detects the driver. Click on the driver and then on “Next” to complete the installation process.
7. Lastly, restart your computer once you finish installing the driver, and then try connecting it to the wifi again.
At times, things are blocked unintentionally by firewalls and antivirus software which create issues. Make sure to turn off all your currently running firewalls and antivirus software while being connected to the network. Once you fix Windows 10 Won’t Connect to WiFi, you can again turn the programs on in order for them to run.
We hope the above article helped you to fix that Windows 10 Won’t Connect to WiFi.
Windows 11 Controller not Working - How to Quickly Fix It?
How to Adjust Brightness, Screen Color, Contrast and Gamma on PC?
How to Clear Cache in Windows 11?
How to Format an NVME SSD on Windows 11?
How to Run Android Apps on Windows 10?
How to Change Monitor Number in Windows Display Settings?
How to Fix Game Opening on the Wrong Monitor?
How to Change the Keyboard Settings to Default on Windows 11?

How to Get Purble Place on Windows 11/10?
~ May 23, 2026
How to Check CPU Temperature Windows 11?
~ May 23, 2026
How to Record Your Screen on Windows 11
~ May 23, 2026How to Fix Icons in Windows 11
~ May 23, 2026
How do I Fix Error Code 0x80070570 on Windows 10
~ May 23, 2026
Fix Touchpad Gestures Are Not Working on Windows 11
~ May 23, 2026
How to Fix the WHEA Uncorrectable Error on Windows 10
~ May 23, 2026
Top Searches in Windows 10
How to Find Windows 10 Product Key 2026?
Dec 8, 2025How to Convert FireWire Connections to USB?
Dec 8, 2025How do I Unlock my Keyboard on Windows 10?
Dec 8, 2025How do I Fix the Unresponsive Taskbar in Windows 10?
Feb 23, 2024How to Install the Amazon Prime Video App on Windows 10?
Dec 8, 2025How to Recover Uninstalled Programs on Windows 10?
Dec 8, 2025Do I Really Need Realtek High Definition Audio in Windows 10?
Dec 8, 2025How to Enable Bitlocker on Windows 10 Home?
Dec 8, 2025How to Change Network Binding Order in Windows 10?
Dec 8, 2025How do I Turn Off Windows Volume Overlay?
Dec 8, 2025