Hi Guys, Please let me know how to install a printer using the windows update catalog driver on windows 10? I am facing this issue last 1 week I don't know how to install it. Help me.
The Windows Update Catalog is a Microsoft service on the web that provides you to download updates manually for Windows 10, but you can also use the website to download drivers, containing for your printer, when the system denies installing the device, or you can't find the correct driver from your manufacturer support website.
In this post, you will learn how to install a printer using the Windows Update Catalog driver on Windows 10.
If Windows 10 isn't able to set up a printer automatically, and you can't find the correct drivers online, you can use the Windows Update Catalog to acquire a suitable driver that you can install manually with the Device Manager or Printer & scanners settings.
To download printer drivers from the Windows Update Catalog website, follow the given below steps:
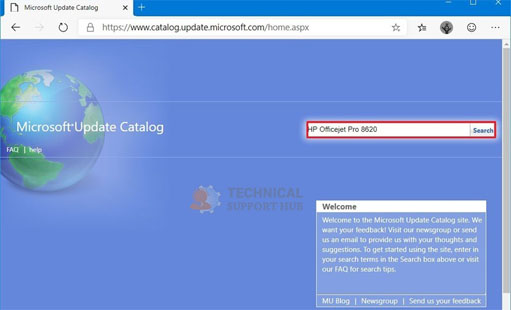
Step 1: Open Windows Update Catalog.
Step 2: Type the model of the printer on the search box (for example, HP Officejet Pro 8620) and click the Search button.
Step 3: Click the Download button for the driver that matches your printer.
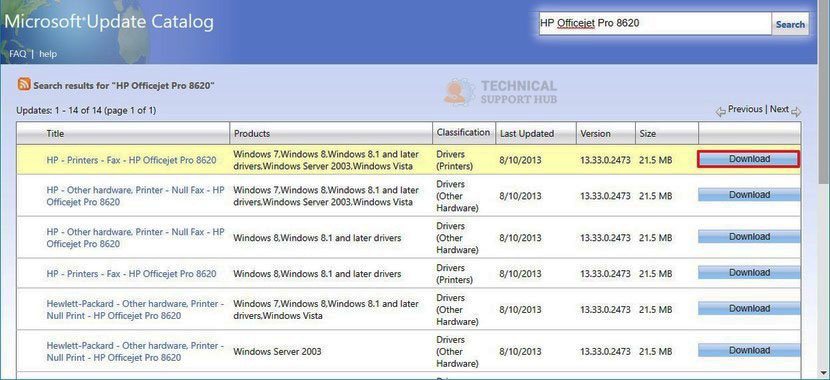
Note: Generally, the package you have to download will have a classification of ‘Drivers (Printers),’ and make sure to download the most up-to-date package available.
1. Click the ‘.cab’ link download driver.
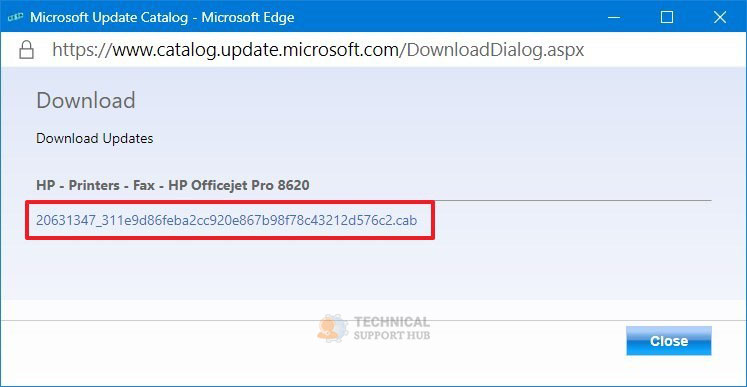
When you finish the steps, the device driver package will download on your computer in a ‘.cab’ container, which you'll have to extract before you can set up a printer.
To remove the driver files from the ‘.cab’ container, follow the steps below:
Open Start.
Step 1: Check for Command Prompt, right-press the top result, and choose the Run as administrator option.
Step 2: Write down the following command to guide to the folder with the driver and press Enter: cd C:\PATH\TO\CAB-FILE
Step 3: This example opens the "Downloads" folder: cd %HOMEPATH%\Downloads\
Step 4: Type the following command to create a folder to extract the driver files and press the Enter key: MD Printer
Step 5: The above command creates a folder called "Printer."
Step 6: Write down the following command to extract files and press the Enter key:
Step 7: expand FILENAME.CAB -F:* C:\EXTRACTION\DESTINATION\FOLDER
Step 8: This example removes the driver files to the ‘Printer’ folder in the ‘Downloads’ folder:
Step 9: expand 20631347_311e9d86feba2cc920e867b98f78c43212d576c2.cab -F:* %HOMEPATH%\Downloads\Printer
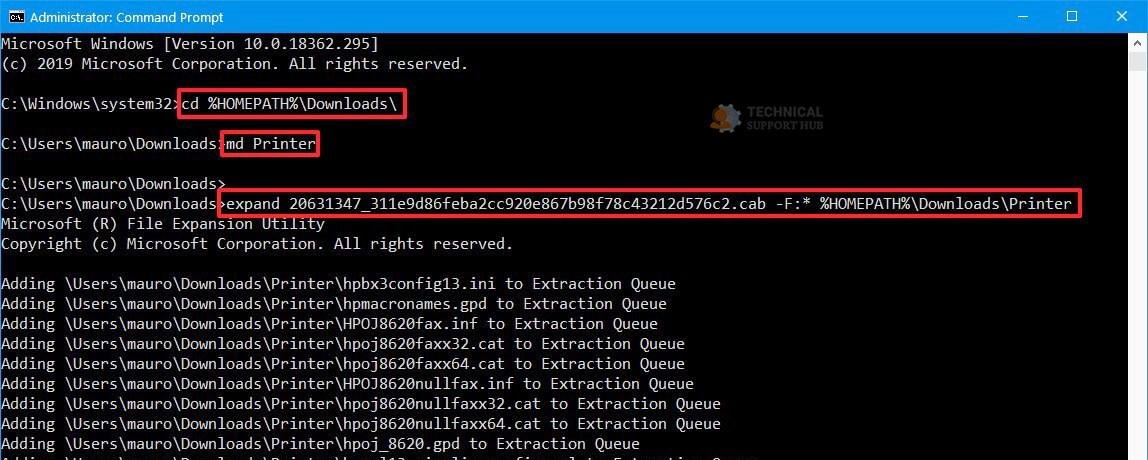
Note: If the name of the file is so long, after typing ‘expand,’ type the first three letters of the name and then press the Tab key to auto-complete the name.
After you complete the steps, you'll end up with a folder that contains the driver files, including the special ‘.inf’ file that contains the instructions to install a printer using the Windows Update Catalog driver on Windows 10.
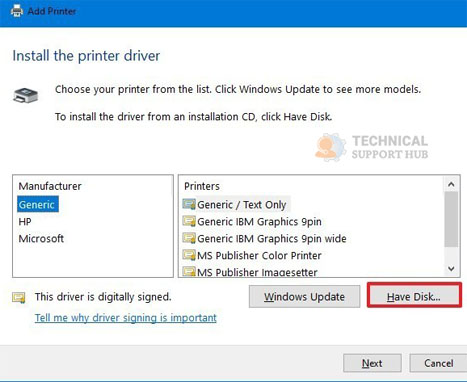
On Windows 10, there are several ways to install a new device driver. If you already connected the printer to the computer and the current driver is damaged, or it's not the correct one, you can update the driver using ‘Device Manager.’ Or, if the printer wasn't identified, or you are setting up a network printer, you can use the ‘Printers & scanners’ settings to install the driver from scratch.
To update the current printer driver on Windows 10, follow the given steps below:
Step 1: Open Start.
Step 2: Take a look at the Device Manager and click the top result to open the app.
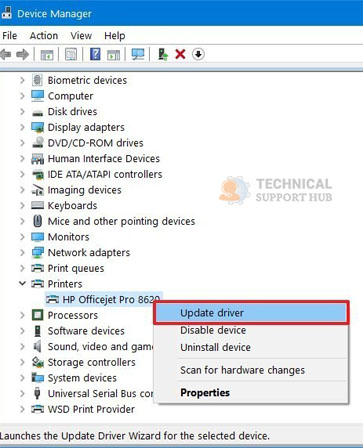
Step 3: Expand the Printers branch.
Note: In case the printer wasn't identified correctly, it might be listed under the Other devices branch.
Step 1: Right-press the printer, and choose the Update driver option.
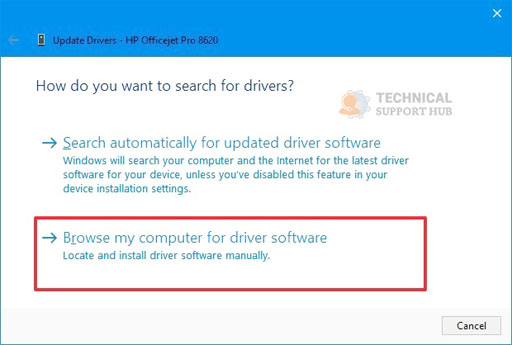
Step 2: Tap on the Browse my computer for the driver software button.
Step 3: Click the Browse button.
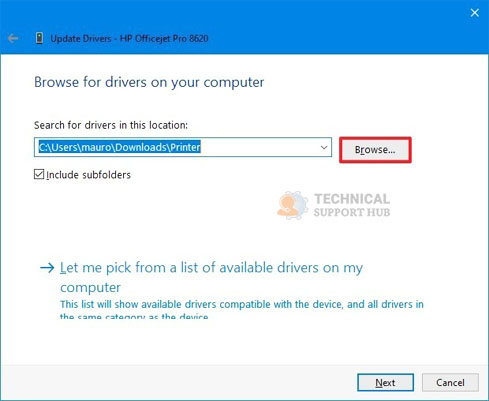
Step 4: Locate the folder with the extracted driver files.
Step 5: Click the OK button.
Step 6: Click the Next button.
Step 7: Click the Close button.
When you finish the above steps, the downloaded printer driver from the Windows Update Catalog will install, and you should be able to start printing without issues.
In case, you can't install the driver because of a problem with the printer, it may be time to upgrade. If you're changing an inkjet printer, we suggest the Canon TS5120 because of its quality when printing text documents along with photos, and the many features you obtain for the low price together with Wi-Fi connectivity, Bluetooth, AirPrint, PIXMA Cloud Link, and social media.
I hope, now you will be able to install a printer using the Windows Update Catalog driver on Windows 10.
Windows 11 Controller not Working - How to Quickly Fix It?
How to Adjust Brightness, Screen Color, Contrast and Gamma on PC?
How to Clear Cache in Windows 11?
How to Format an NVME SSD on Windows 11?
How to Run Android Apps on Windows 10?
How to Change Monitor Number in Windows Display Settings?
How to Fix Game Opening on the Wrong Monitor?
How to Change the Keyboard Settings to Default on Windows 11?

How to Get Purble Place on Windows 11/10?
~ May 23, 2026
How to Check CPU Temperature Windows 11?
~ May 23, 2026
How to Record Your Screen on Windows 11
~ May 23, 2026How to Fix Icons in Windows 11
~ May 23, 2026
How do I Fix Error Code 0x80070570 on Windows 10
~ May 23, 2026
Fix Touchpad Gestures Are Not Working on Windows 11
~ May 23, 2026
How to Fix the WHEA Uncorrectable Error on Windows 10
~ May 23, 2026
Top Searches in Windows 10
How to Find Windows 10 Product Key 2026?
Dec 8, 2025How to Convert FireWire Connections to USB?
Dec 8, 2025How do I Unlock my Keyboard on Windows 10?
Dec 8, 2025How do I Fix the Unresponsive Taskbar in Windows 10?
Feb 23, 2024How to Install the Amazon Prime Video App on Windows 10?
Dec 8, 2025How to Recover Uninstalled Programs on Windows 10?
Dec 8, 2025Do I Really Need Realtek High Definition Audio in Windows 10?
Dec 8, 2025How to Enable Bitlocker on Windows 10 Home?
Dec 8, 2025How to Change Network Binding Order in Windows 10?
Dec 8, 2025How do I Turn Off Windows Volume Overlay?
Dec 8, 2025