Hello Everyone, Please let me know Why DNS server is not responding on Windows 10? I tried many times but not responding. So Can anyone have any idea? Help me.

DNS servers are a very significant part of the internet but what to do when this server refuses to respond? Have you come across a similar kind of situation? Are you also troubled by the problem of DNS servers not responding on Windows 10. If yes, then worry not as here we are available with multiple remedies that can help you fix this problem.
It is impossible for one to access the internet if he or she is not able to access the DNS server. Once the request has been received by the DNS server, you will be sent to the webpage that you want to open.
The fastest and easiest way to resolve this issue is to make alterations in the DNS server settings. After that, disable the firewall, reset the router unit, and then check the connection. In case this problem still continues, then try to fix it by applying the solutions given below.
Some users have said that the DNS server not responding to Windows 10 problem can be fixed just by manually entering the name of the network adapter. The process to follow is quite simple and below mentioned are the steps that you need to carry out.
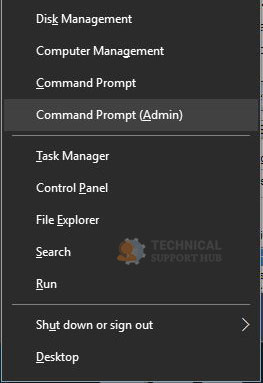
Step 1: The first thing that you need to do is to press the Windows key and X key simultaneously to open the command prompt.
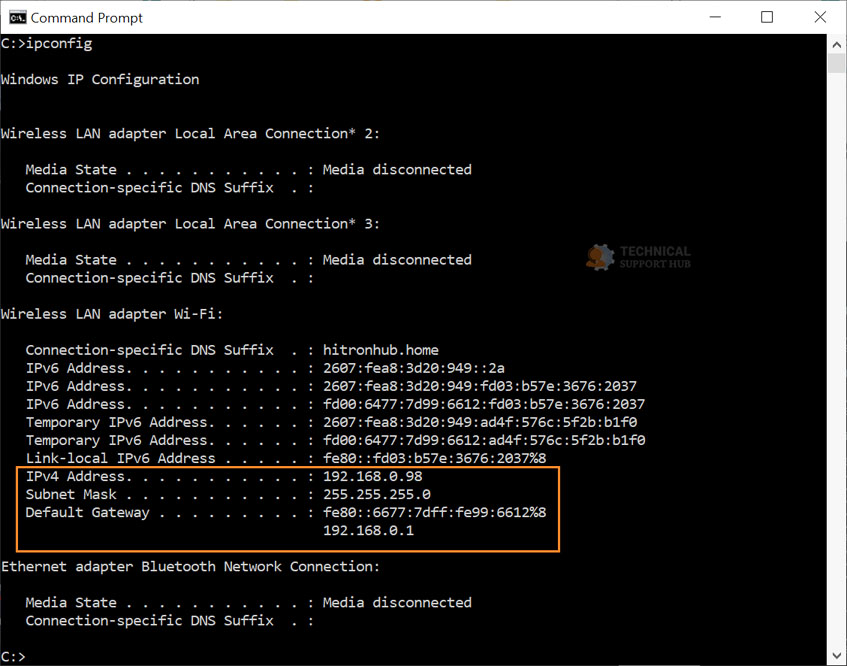
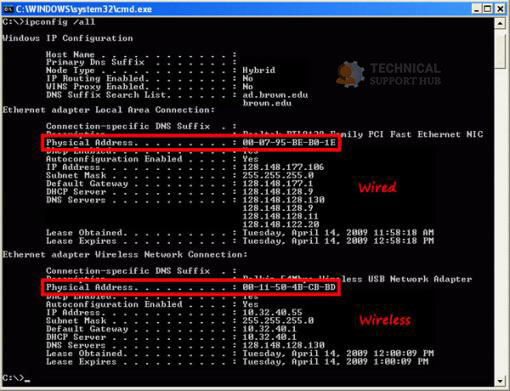
Step 2: Once it is opened up, then enter inconfig/all and then press the Enter key.
Step 3: A list of details will open up before you. Start searching for the physical address and then write it down.
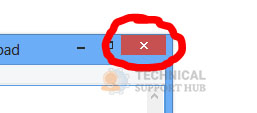
Step 4: click on the cross button and close the command prompt.
Once you know what your Mac address is, the next thing that you need to do is to configure the network connection.
a) Open the window of Network Connections. Now, search for the connection and then open properties.
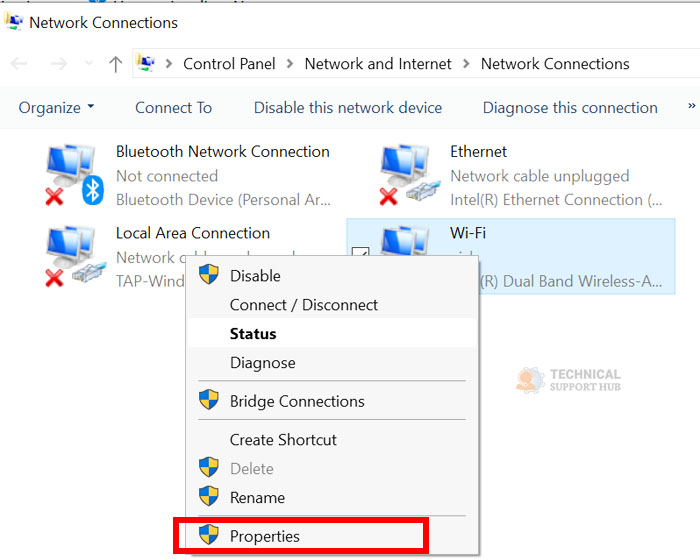
b) Select the option of Configure from the Window of properties.

c) Go to the tab of Advanced and then select the option of Network Address by going to the properties list.

d) After that, choose the value and enter the address that you received from the command prompt. Please ensure that you don’t enter any dashes at the time of entering the MAC address.
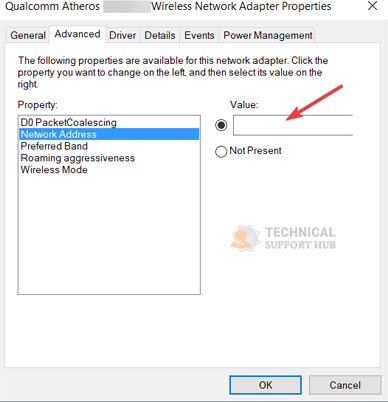
e) Select ok for saving the changes.
When one tries to open a particular website, he or she automatically gets connected to the DNS server of the internet service provider. There is a chance that your DNS server is unavailable. If this is what’s happening, then you will see an error message, which says the DNS server is not responding.
One way through which you can resolve this issue is to change open DNS, DNS server or Google DNS. The process is quite simple and below mentioned are the steps that you need to follow.
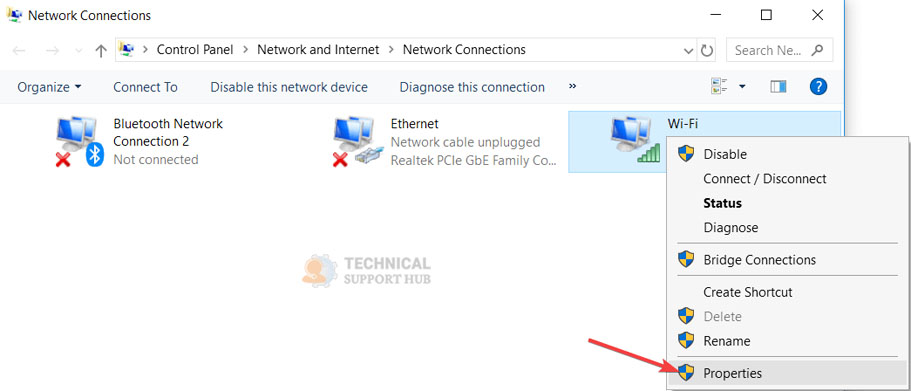
Step 1: First of all, select the option of network connection by pressing the Windows key and X key simultaneously.
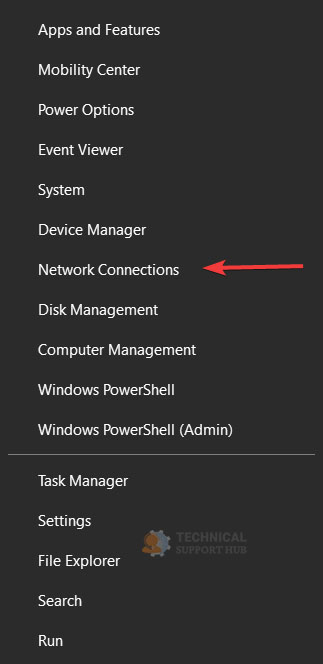
Step 2: Search for your network connection and then select properties by right-clicking on it.
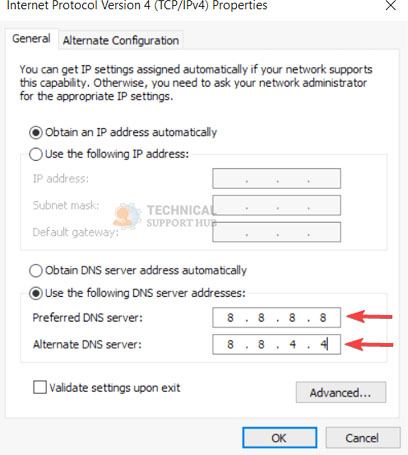
Step 3: Once the properties window opens up, the next thing that you need to do is to choose Internet Protocol Version 4 and then select the button of properties.
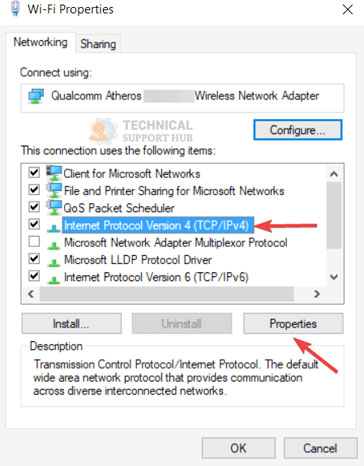
Step 4: After that, select the option of DNS server addresses.
Step 5: Enter 8.8.8.8 as a preferred server of DNS. You can also enter 8.8.4.4 as an alternate server. Moreover, you have a choice to use 208.67.222.222 as preferred and 208.67.220.220 as an alternate one.
Step 6: Once you are done, select ok for saving changes.
Step 7: Disconnect the internet and then reconnect it.
Once you are done changing the server, then the issue will be permanently resolved.
However, you need to keep one thing in mind and that is your DNS server can slow down the internet speed. Therefore, you may feel the need of using other servers.
A lot of users have reported that the issue of DNS server not responding on Windows 10 issue arises when they are using Wi-Fi. Therefore, you must try fixing this issue by performing a firmware update on your router. This is an advanced step. Therefore, you may require to take some precautions to avoid the risk of damage.
Prior to updating the firmware of your router, please make sure that you have created a backup of your settings. In order to properly update the firmware of your router, we would recommend you to read out the manual that was provided to you.
So, these are the different methods that you can apply to fix the problem of DNS server not responding on Windows 10.
Windows 11 Controller not Working - How to Quickly Fix It?
How to Adjust Brightness, Screen Color, Contrast and Gamma on PC?
How to Clear Cache in Windows 11?
How to Format an NVME SSD on Windows 11?
How to Run Android Apps on Windows 10?
How to Change Monitor Number in Windows Display Settings?
How to Fix Game Opening on the Wrong Monitor?
How to Change the Keyboard Settings to Default on Windows 11?

How to Get Purble Place on Windows 11/10?
~ May 23, 2026
How to Check CPU Temperature Windows 11?
~ May 23, 2026
How to Record Your Screen on Windows 11
~ May 23, 2026How to Fix Icons in Windows 11
~ May 23, 2026
How do I Fix Error Code 0x80070570 on Windows 10
~ May 23, 2026
Fix Touchpad Gestures Are Not Working on Windows 11
~ May 23, 2026
How to Fix the WHEA Uncorrectable Error on Windows 10
~ May 23, 2026
Top Searches in Windows 10
How to Find Windows 10 Product Key 2026?
Dec 8, 2025How to Convert FireWire Connections to USB?
Dec 8, 2025How do I Unlock my Keyboard on Windows 10?
Dec 8, 2025How do I Fix the Unresponsive Taskbar in Windows 10?
Feb 23, 2024How to Install the Amazon Prime Video App on Windows 10?
Dec 8, 2025How to Recover Uninstalled Programs on Windows 10?
Dec 8, 2025Do I Really Need Realtek High Definition Audio in Windows 10?
Dec 8, 2025How to Enable Bitlocker on Windows 10 Home?
Dec 8, 2025How to Change Network Binding Order in Windows 10?
Dec 8, 2025How do I Turn Off Windows Volume Overlay?
Dec 8, 2025