Hi Guys, Please let me know how to set up the Roku Ultra streaming device? I am facing this issue last 1 week I don't know how to set it. Help me.
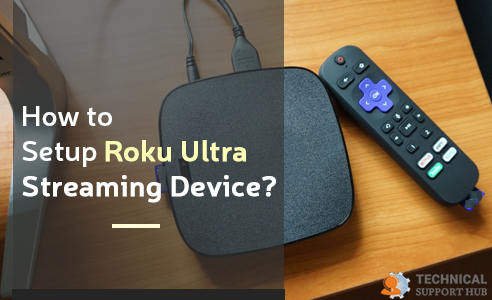
Roku ultra supports 1080p HD, 720p HD, 4K Ultra HD HDR(High Dynamic Range). It is shipped together with an enhanced remote “Point Anywhere” which has a number of useful buttons such as gaming buttons, remote buttons, control, power, voice search, and volume buttons.
Additionally, it has a headphone Jack that allows you to privately listen to any video by putting on your JBL premium headphones. Here in this article, you are going to learn about this product in detail and also mentions the steps to be performed to setup the Roku ultra streaming device.
Roku Ultra can be used with any television if you connect with an HDMI cable. Nevertheless, you will get the benefit of 4K resolution that too without watching a 4K compatible television. A compatible television does not only allow you to stream TV shows and movies but it also enables you to do other things.
It is recommended to use high-speed HDMI cable in case your television only supports 1080p or 720p. You can also purchase a premium speed HDMI cable if your television supports 4K HDR or 4K.
Please ensure that the TV input that you have selected on your television is correct. Take a look at the Roku logo appearing on the TV screen when you turn on your Roku player.
The first screen that you are going to view will enable you to select a language. All the information in the application of Roku will be shown in the language that you select. Go up and down and view the list and then finally click on OK button.
Keep in mind that it is the job of the publisher of the channel to convert the language into your preferred one but there is a chance that some channels may not support the language that you have selected.
In case you are using a wired network connection, then use an ethernet wire to connect your Roku Ultra and then setup wired connection. In case, you are using a wireless connection, then here are the steps that are mandatory for you to follow to finally setup Roku ultra streaming device
Choose your Wi-Fi networks from the list of networks appearing in front of you and then put-in the password. Generally, this is the same network with which your smartphone or computer system is connected. In case, you cannot view your network, then scan again to look at all the networks.
If you want to display the password that you are typing, then in that case select show password. This can stop you from putting in the wrong password. One thing that you must not forget is that the passwords are generally case sensitive. Therefore, you are entering a capital letter, then you must use the button of shift.
After entering the password, select the button of connect and then your Roku ultra is going to get connected to the internet automatically. Alternately, you can obtain further assistance if you are not able to get connected to the Wi-Fi network.
When your Roku will get connected to the internet, it will start downloading the latest version of the Roku operating system to finally setup Roku ultra streaming device.
Choose auto-detect for selecting the type of display and after that the Roku ultra will begin analyzing the HDMI connection for determining the selected video resolutions that are supported by it. If you wish not to configure the settings manually, then click on OK and go to automatic. If you want to change the display type at some time later, then select settings and then choose display type.
In case, it does not detect support for 4K HDR or 4K and you are using a 4K compatible television set, then you need to ensure that the HDMI wires are properly attached and every connection supports HDCP 2.2.
Select check remote settings for setting up the enhanced Roku remote for controlling your TV’s volume and power. You can also go to the settings menu and setup your enhanced remote at any point of time. Go to settings, remotes, and devices, then remote and then set up your remote for TV control. This is a part of the process to set up Roku ultra streaming device.
These points can only be used if you are using an enhanced remote of Roku that has volume buttons and TV power button.
There are certain TV models where your Roku will only be able to control the volume buttons and not the power button.
For activating your Roku Ultra, you need to connect it with your Roku account. It keeps a track of the Roku devices that you own. It also enables you to purchase or add channels by going to the Roku store. Moreover, you must keep in mind that you don’t need to pay any amount for creating a Roku account.
The steps on how to activate Roku Ultra are shown on your TV along with an activation code. You need to go to the Roku website on your Smartphone or PC for entering the code and carefully adhere to the instructions for activation.
Note: You don’t have to pay any amount for activating the device.
Once all the activation steps have been carried out, then you will finally be able to use your Roku Ultra. This is how you set up the Roku ultra streaming device.
How to Fix Your Roku Voice or Simple Remote that is not Working?
How to Connect Airpods to Roku TV?
How to Fix Roku Error Code 014.30?
How to Fix It When Disney Plus is not Working on Roku?
How to Pick the Right Roku for Your TV?
How to Fix It When Roku TV Sound is not Working
How to Fix Roku TV Apps not Working?
~ May 23, 2026
How to Install Zwift on Roku Connected TV?
~ May 23, 2026
How to Register MagicJack With and Without a Computer?
~ May 23, 2026
How to Connect magicjack to Wifi?
~ May 23, 2026
How to Fix a Black Screen on Roku?
~ May 23, 2026
How to Turn Off HDR on Roku TV?
~ May 23, 2026

Top Searches in Roku Streaming
How do I Connect Roku TV to Wifi Without a Remote?
Jan 3, 2025How to Fix Roku Remote Green Light Flashing Issues?
Dec 8, 2025How to Create a Roku Channel in 3 Steps?
Dec 8, 2025How do I Activate my Roku Without Paying?
Dec 8, 2025How to Disable or Block Ads on Roku or Roku TV Home Screen?
Dec 8, 2025How do I Get a Link Code for Roku TV?
Dec 8, 2025How to Stream Fios TV on Roku Connected TV?
Dec 8, 2025How to Login magicJack Account - My.MagicJack.com
Dec 8, 2025How to Watch Cox Contour on Roku?
Dec 8, 2025How Can I Port my magicJack Number to Another Provider?
Dec 8, 2025