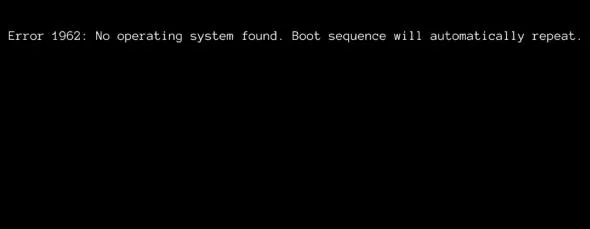
Fix the Lenovo PC Error 1962: No Operating System Found
If you are using a Lenovo computer, then you may have come across the PC error 1962. This problem appears because of a corrupt boot sequence or when your boot order priority is not configured properly. You are going to experience this problem at random intervals.
Sometimes this problem will arise within 2-3 days and sometimes within 2-3 hours. This is going to take a few hours before your device can boot up properly. Therefore, making things really inconvenient for you. Moreover, this error appears on affected devices.
We came up with accessible solutions to fix this issue. But first, we need to check why this error shows up on your screen.
Why do you see PC error 1962 on your screen?
Below are the possible reasons why the PC error 1962 shows up.
Faulty hard disk drive: One of the common reasons for PC error in 1962 is a faulty hard disk. The common symptoms of this issue are sluggish performance, corrupt files, and unusual noises.
Startup errors: When you see this error message at the time of startup, then it may indicate specific issues and you need to troubleshoot this problem as soon as possible. If that's the case, then you should not waste your time testing unrelated pieces of your hardware.
How should I fix the Lenovo PC error 1962: No operating system found?
Below are the different troubleshooting solutions that you need to apply to fix the error 1962 on my Lenovo computer.
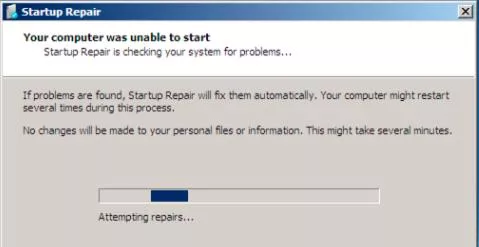
1) Run Startup Repair
Step 1: First of all, you are required to create bootable media.
Step 2: Insert a bootable DVD or USB and then start up Windows from it.
Step 3: Go to the window of Windows setup and then choose the language to install. After that, choose the Time and Currency format and then finally select the keyboard or input method.
Step 4: Choose to Repair Your computer and then finally select Troubleshoot.
Step 5: Then, select advanced options.
Step 6: Select automatic repair and then select the OS.
Step 7: Once you are done with the repair process, carry out the prompts for booting your Windows computer.
2) Use automated software to fix your problem
You can use specialized software to fix your problems. When you restore your system to its previous state, it can fix many problems for you and that works really well for you.
Restore will scan your computer for problematic files and will replace all the Windows files that are causing the problem with the previous version of the file that worked perfectly.
Below are the steps that you need to follow to use automated software to fix the problem.
Step 1: Download Restore and then install it.
Step 2: Open this app.
Step 3: Now, the app will search for system stability issues.
Step 4: Select the option of Sart Repair.
Step 5: After that, restart your computer.
The inbuilt restoration tool will bring Windows back to an earlier version. However, you may lose some data that you stored on the new version of Windows. If you want, you can always go back to the pre-repair condition of Windows.
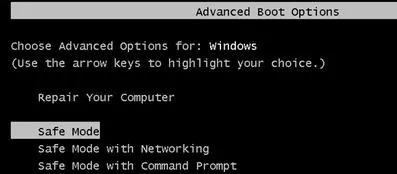
3) Use Safe Mode to run System Restore
Step 1: Press the power button on your Desktop and wait for it to shut down. After that, press it one more time to change the screen.
Step 2: If you own a laptop, then you are required to start your OS in Safe Mode. For this, press the Power icon and then press the Shift key to select Restart.
Step 3: After that, choose Troubleshoot.
Step 4: Then, you need to select Advanced options.
Step 5: After that, go to Startup Settings.
Step 6: In the end, select Restart.
Step 7: Press the F4 key to run the OS in Safe Mode.
Step 8: When you see the Safe Mode desktop, press the Windows key and then create a restore point and then select the result.
Step 9: After that, select the System Protection tab and then choose System restore.
Step 10: After that, you are required to select the recommended restore point or choose a different one and then select Next.
Step 11: Confirm the Restore Point you selected and wait for the process to finish and then select Reboot.
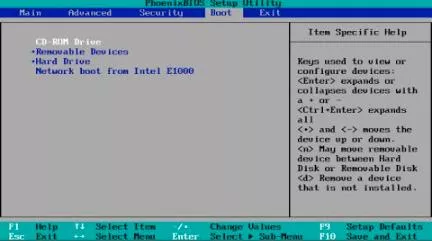
4) Change Boot priority in BIOS
Below are the easy steps that you need to follow to change the boot priority in BIOS.
Step 1: Press alt+ctrl+del on your keyboard.
Step 2: At the time of booting, press the F12 key many times in a row to open the BIOS setup.
Step 3: When you see the Setup box, press the Enter key.
Step 4: Go to the Startup tab and then choose CSM and then press the enter key once again.
Step 5: After that, choose Enabled.
Step 6: Search for Boot priority and then press the Enter key.
Step 7: Change the present option of Legacy First.
Step 8: After that, press the F10 key and then select YES. After that, wait for your computer to reboot.
So, these are the different solutions that you can apply to fix the Lenovo PC error 1962: no operating system found.
- Published by: Mick
- Category: Laptop
- Last Update: 5 days ago
Related Blog
How to Connect Airpods to Laptop
~ Dec 8, 2025Spot Geek Squad Scams: Safety Tips 2025
~ Dec 8, 2025How To Fix Your Laptop Overheating Problem
~ Dec 8, 2025How to Fix Laptop Speakers not Working
~ Dec 8, 2025How to Download Snapchat Without the App Store PC Guide
~ Dec 8, 2025Fix the Lenovo PC Error 1962: No Operating System Found
~ Dec 8, 2025Featured Blog
How to Fix Error Code csc_7200026 on AliExpress
Dec 8, 2025How to Cancel Your Club Pogo Account
Dec 8, 2025DuckDuckGo Not Working? Why & How to Fix it
Dec 8, 2025How to Register a Supercell ID Account?
Dec 8, 2025Spot Geek Squad Scams: Safety Tips 2025
Dec 8, 2025Top Questions
How to Find Windows 10 Product Key 2025?
Dec 8, 2025How to Increase Wifi Speed in laptop Windows 10?
Dec 8, 2025How to Convert FireWire Connections to USB?
Dec 8, 2025How do I Unlock my Keyboard on Windows 10?
Dec 8, 2025How to Create a Roku Channel in 3 Steps?
Dec 8, 2025How to Fix Gmail App Keeps Crashing Problem?
Dec 8, 2025Categories
- OTT
- 616 ~ Articles
- Windows
- 491 ~ Articles
- 164 ~ Articles
- Browser
- 145 ~ Articles
- Laptop
- 72 ~ Articles
- Antivirus
- 40 ~ Articles
Top Searches in Laptop
Fix the Lenovo PC Error 1962: No Operating System Found
Dec 8, 2025How to Fix Something Happened and Your PIN isn’t Available
Dec 8, 2025Spot Geek Squad Scams: Safety Tips 2025
Dec 8, 2025Do You Really Need Bonjour on Your Computer
Dec 8, 2025How to Download Snapchat Without the App Store PC Guide
Dec 8, 2025How to Improve Sound Quality on Laptop & PC
Dec 8, 2025How to Fix Laptop Speakers not Working
Dec 8, 2025How to Use Bluetooth to Connect a Wii Remote to a PC
Dec 8, 2025How To Fix Your Laptop Overheating Problem
Dec 8, 2025My Computer is Running Slow What Steps can I Do to Fix It
Dec 8, 2025