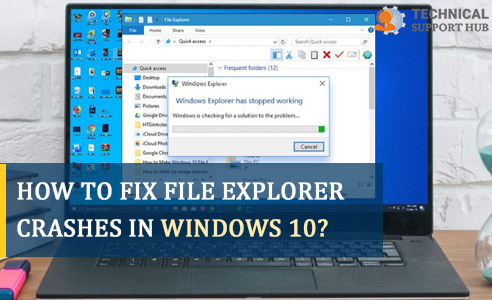
Hello Everyone, Please let me know how to fix File explorer crashes in windows 10? I tried many times but failed. So Can anyone have any idea? Help me.
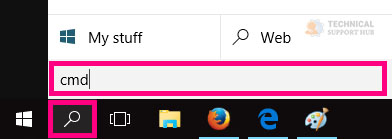
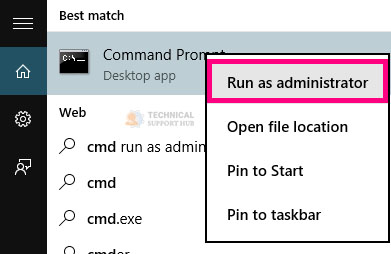
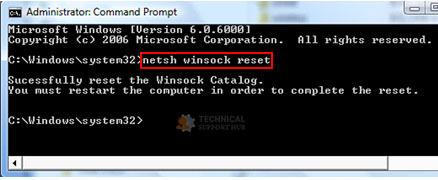
Step 1: In the search box, enter “cmd” > right click on the command prompt > Run as administrator.
Step 2: Then Type netsh in Command Prompt > and press Enter.
Step 3: Type Winsock in Command Prompt > and then hit Enter.
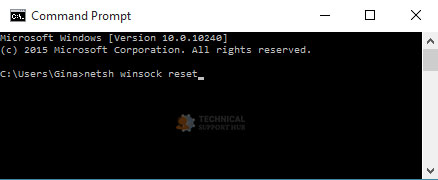
Step 4: You can also use the entire command netsh Winsock reset in a single fix attempt.
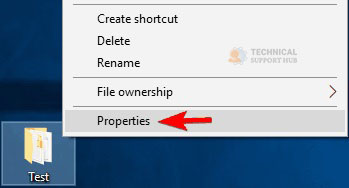
Step 1: Primarily, go to File Explorer > and then right-click the folder where the files are saved > click on the Properties.
Step 2: Next, open Security > and click on Advanced.
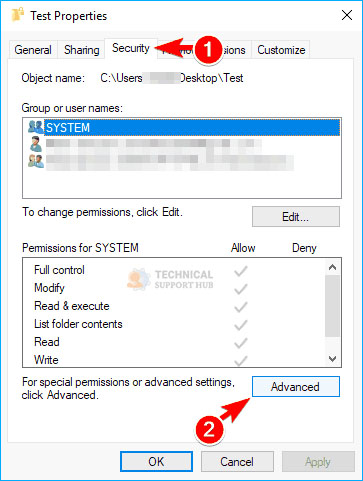
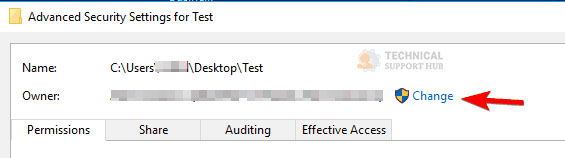
Step 3: Click on the change (besides the owner option) and once the new window pops up on the screen, click on “Advanced”.
Step 4: In case you have already decided which username you want to add, simply enter it in the field Enter the object name to select.
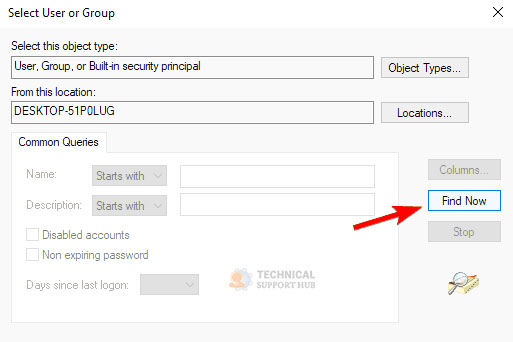
Step 5: Go to the Advanced option, a new window will open > click on Find now to view all the groups and users from your computer.
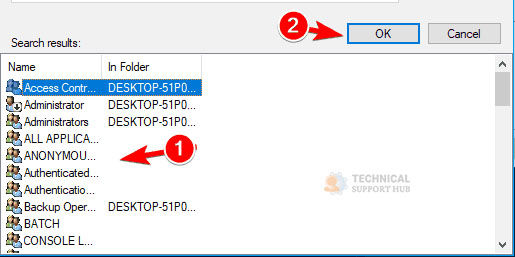
Step 6: Now choose the name or group from the available list and then click on OK. Lastly, save the changes.
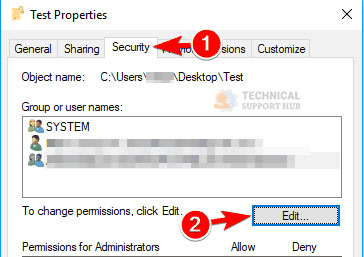
Step 7: Following that, for your account set full access to the file folder. To get access to the file folder, you will have to right-click on the folder > then go to properties > click on security > and then select edit.
Step 8: Next, In the Allow column for your account, Set permissions to Full control and click then click on Apply and OK to save changes.
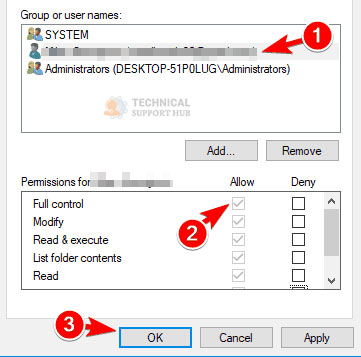
Step 9: If your account name isn't showing in the list then click on the Add button to add it. (This action is necessary because sometimes the Windows 10 Installer doesn’t properly manage file permissions).
Step 1: Firstly, press Windows Key + S and hit the folder options.
Step 2: Then from the menu, click on the File Explorer Options and open the View tab.
Step 3: Check Launch folder windows in a separate process and then click on Apply and OK to save changes.
Uneven settings might also cause your windows 10 to crash. So try enabling your windows settings to fix File Explorer crashes in Windows 10 as it is one of the simplest solutions to try to fix the issue.
Step 1: To open the Settings app, press on the Windows Key + I and then go to the System section.
Step 2: Now go to the Scale and layout section and then set the font size to 100%. You can also use 200% if you want a bigger size.
At times, incorrect font size might also be the reason behind your file explorer crashing. There are chances for the issue to get resolved once you change the font size via settings.
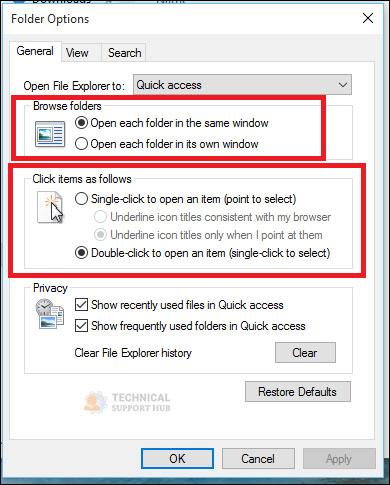
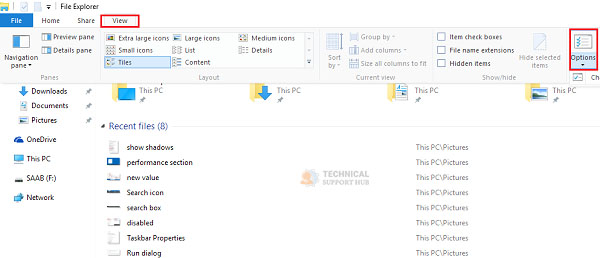
Step 1: Go to the File Explorer Options.
Step 2: Then open the Privacy section and disable Show recently used files in Quick access and Show frequently used folders in Quick access. Now click on
Step 3: Apply and OK to save changes.
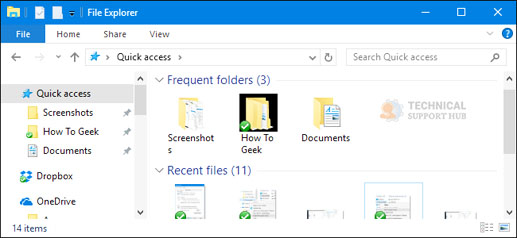
The quick access section lets you quickly access recently opened files or folders. Due to that, Quick access features can cause File Explorer crashes to occur. Disabling recent files and folders from appearing in the Quick access section helps to fix File Explorer crashes in Windows 10. Once that happens, recent files and frequently used folders won’t appear in the Quick access section and your issue will probably be resolved.
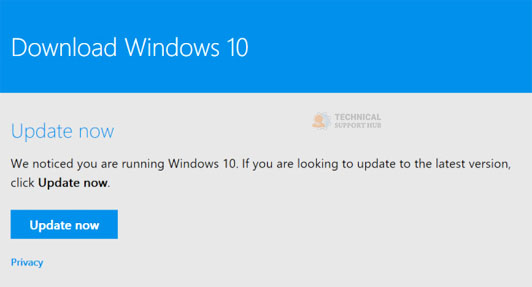
Go to the Settings app > open the Update & security section and then Click on Check for updates button.
Windows downloads the updates automatically in the background, but sometimes you might miss an important update. Windows will now check for available updates. If updates are available, Windows will download them in the background and install them once you restart your computer system.
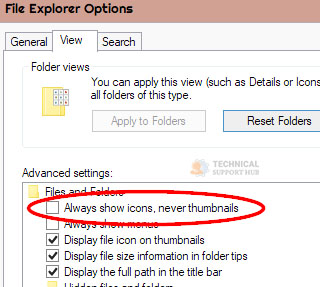
Step 1: Open any directory in File Explorer and then Go to the View tab
Step 2: Now, ensure that the Preview panel option isn’t selected.
Step 3: Once again, go to the view tab > then click on options and a folder options window will appear on your screen.
Step 4: Navigate to the View tab and then uncheck Show preview handlers in the preview pane option.
Step 5: Next, click on Apply and OK to save changes.
Go to the File Explorer Options and then once the file explorer options window pops up on your screen, set Open File Explorer to This computer and then click on Apply and OK to save changes.
Sometimes Quick Access can cause File Explorer crashes and above is the solution to set Open File Explorer to This computer to fix File Explorer crashes in Windows 10.
Antivirus code is very vital if you wish to guard your computer system from online threats. sadly, many users rumored that their antivirus code caused issues with File explorer.
According to them, your antivirus will cause File explorer crashes, thus so as to mend the matter, it’s suggested to disable your antivirus. If disabling the antivirus doesn’t facilitate, you may uninstall it. Make sure that only removing anti-virus won't work effectively, so you might have to remove all files and registry entries associated with it to fix File Explorer crashes in Windows 10.
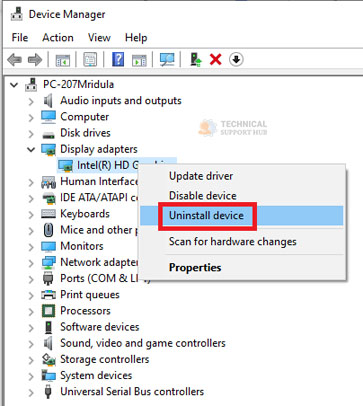
Step 1:To open the Win + X menu, Press Windows Key + X.
Step 2: From the displayed list, click on Device Manager.
Step 3: Go to your graphics card driver, right-click on it and then from the menu, click on Uninstall device.
Step 4: Next, check to Delete the driver software for this device and then hit the Uninstall option.
Sometimes, your graphic card driver might also be the reason for your file explorer crash. So, You will have to remove all files associated with your graphics card in order to fix File Explorer crashes in Windows 10.
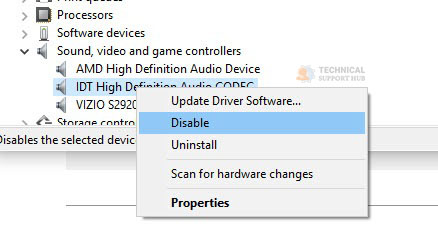
Step 1: Go to the Settings app and go to the Apps section and a new window with a list of all the installed apps will appear.
Step 2: Next, from that list click on the IDT Audio and then on the Remove option.
Step 3: Lastly, follow the onscreen instructions to remove IDT Audio.
Now, in case you don't or are unable to use the settings app then below are the steps on uninstalling IDT audio without
settings app.
Step 1: Press Windows Key + S and enter the control panel and from the list, click on the control panel.
Step 2: Once the control panel window pops up on the screen, go to programs & features.
Step 3: Now, select IDT Audio from the available list of all the installed apps on your screen and then double-click it.
Step 4: Lastly, follow the onscreen instructions to remove the IDT Audio.
Again, Few users claim that you don’t even have to uninstall IDT audio, you can simply change the name of its Control Panel
app.
Start Command Prompt as administrator and then enter ren IDTNC64.CPL IDTNC64.CPL.old and press Enter to run it.
The issue will probably resolve once the command is executed.
Step 1: Download ShellExView and start it.
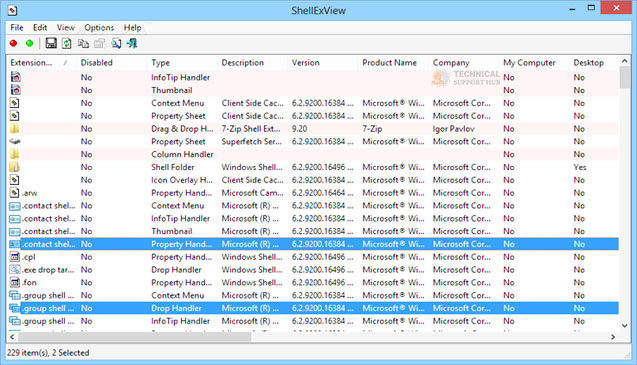
Step 2: you can run it without installation as this is a portable application.
Step 3: Once the ShellExView starts, click on Options and select the Filter by Extension Type.
Step 4: Next, click on the Context menu and then on OK.
Step 5: Search for a third-party application that you prefer to disable, right-click it and then click on the Disable Selected Items. (Or if you want, You can also select multiple items of your preference).
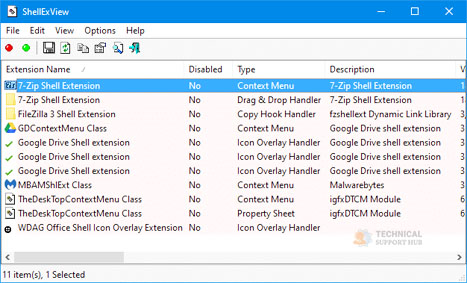
Step 6: Following that, you will receive a confirmation message, then click on Yes to disable the selected application.
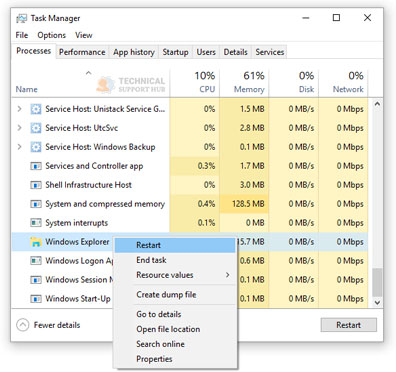
Step 7: Once you are done with disabling the selected options, go to the options > and then click on Restart explorer.
Step 8: Again, you will receive a confirmation message, then click on Yes to restart windows explorer.
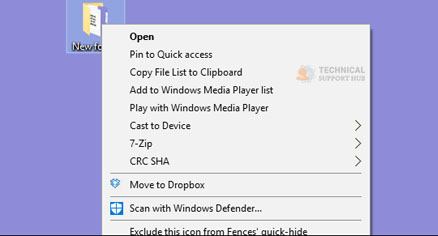
Below are some of the items that can cause your file explorer to crash as in general third-party apps add their features to your context menu and makes it difficult for you to fix the issue.
At times, File Explorer crashes might occur due to malicious files. Many of you have reported this issue due to a certain .tmp file in C:/ProgramData/Microsoft/PerformanceMonitor/being malicious. Once the problematic file is removed, the issue is resolved completely.
We hope the above article helped you to fix File Explorer crashes in Windows 10.
Windows 11 Controller not Working - How to Quickly Fix It?
How to Adjust Brightness, Screen Color, Contrast and Gamma on PC?
How to Clear Cache in Windows 11?
How to Format an NVME SSD on Windows 11?
How to Run Android Apps on Windows 10?
How to Change Monitor Number in Windows Display Settings?
How to Fix Game Opening on the Wrong Monitor?
How to Change the Keyboard Settings to Default on Windows 11?

How to Get Purble Place on Windows 11/10?
~ May 23, 2026
How to Check CPU Temperature Windows 11?
~ May 23, 2026
How to Record Your Screen on Windows 11
~ May 23, 2026How to Fix Icons in Windows 11
~ May 23, 2026
How do I Fix Error Code 0x80070570 on Windows 10
~ May 23, 2026
Fix Touchpad Gestures Are Not Working on Windows 11
~ May 23, 2026
How to Fix the WHEA Uncorrectable Error on Windows 10
~ May 23, 2026
Top Searches in Windows 10
How to Find Windows 10 Product Key 2026?
Dec 8, 2025How to Convert FireWire Connections to USB?
Dec 8, 2025How do I Unlock my Keyboard on Windows 10?
Dec 8, 2025How do I Fix the Unresponsive Taskbar in Windows 10?
Feb 23, 2024How to Install the Amazon Prime Video App on Windows 10?
Dec 8, 2025How to Recover Uninstalled Programs on Windows 10?
Dec 8, 2025Do I Really Need Realtek High Definition Audio in Windows 10?
Dec 8, 2025How to Enable Bitlocker on Windows 10 Home?
Dec 8, 2025How to Change Network Binding Order in Windows 10?
Dec 8, 2025How do I Turn Off Windows Volume Overlay?
Dec 8, 2025